Pages

Saturday, 31 December 2011

Like sand through the hour glass ...

No, I'm not a soapie fan!. I'm just aware of the last few granules of sand running through the 2011 hourglass! I have been a useless blogger and I'm not even going to come up with excuses, because it's hard enough to forgive myself! I won't expect you to do the same! But, I was determined to blog at least one more time in 2011, so here we go ...
Talking about sand I thought I'll share some pictures of cards that I've done for Katya. She discovered me after getting married, so she decided the ask me to do thank you cards for her wedding, in stead of the invitations themselves. Katya had sent me images of her wedding stationery and asked me to use my butterfly design on cardstock that would compliment her invitations. I was so excited, because just before Katya contacted me I've discovered a new cardstock colour that I was desperately wanting to "test drive". The colour is called "Sand" and it has a beautiful shimmer to it. I knew this would be perfect, but of course I gave Katya some other colour options too and did my best not to force my personal preferences on her. When Katya contacted me to tell me that she chose the sand and white colour combination I was over the moon. It was exactly what I thought would work the best too and I could start playing with the new shade of paper straight away ...
The sand cardstock is a lovely neutral, but rich colour. It was a perfect match for Katya's black and white invitations, but it goes equally well with bright colours and pastels. It does make me think of sandy beaches, but it also reminds me of  a nice warm cuppachino ...
I have to apologise for the photographs which aren't that great, but at least they will give you a general idea of what I was up to ...


Since the cards were to be written by hand I've included a simple, but elegant crystal white insert (also with a shimmer). The handmade envelopes matched the inserts.


Try not to peek through the card at my messy desk! I just wanted to include this photo to show off the beautiful lace effect of lasercutting!


Yes, this is a bit of a silly photo, but it so well demonstrates one more reason why I love lasercutting. The sun unexpectedly came out from behind a cloud and shone through the lasercut details of a card standing upright on my desk, waiting for an insert.


I hate it when anything goes to waste, so I've used the off-cuts from the above batch of cards to make the bottom layer of these layered tags (available on Etsy). The top layer is from a single sheet of scrapbooking paper that I simply could not resist ...


On the above photo you can see the tags from the back.

Thursday, 15 September 2011

Wooden planes with customisation option

 
My lounge hangs full of pictures from countries that Hubby and I have visited. We have a vintage map of Africa on one of our walls (Hubby is the proud owner and he had it even before he had me!) and a collection of little treasures that we've collected on our trips to other countries. So being a bit of a traveller myself, I guess it isn't strange that I've also been bitten by the travelling theme bug when it comes to weddings, celebrations and home decor!

I'm especially in love with the idea of boarding pass and passport invitations - not to mention those old maps, vintage postcards, and other travel related treasures that are so trendy right now!

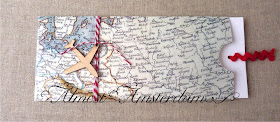
At present I am working on stationery for a wedding with a much more feminine touch, but in between everything pink and flowery I came up with a fun little item for my Etsy shop:  tiny wooden aeroplanes! 

These little aeroplanes are lasercut from thin, very lightweight wood. They will hardly add any weight to
wedding stationery and invitations (to keep mailing costs down), but they are sure to add an element of fun to any travel themed affair. I've tied one to a simple vintage map pocket/sleeve with baker's twine to show you what the planes look like:


 These little planes are available in my Etsy shop, but you can also e-mail me directly if you prefer to do so. I'm very flexible when it coms to making them. I can make them with or without a hole. The hole is big enough for baker's twine, but if you want to thread them onto something thicker I can supply you with jump rings which will alow you to use them on ribbon and thicker fibres.They can also be made without a hole so you can stick them flat onto paper projects. They come unvarnished and although lovely as they are, they are also easy to paint, stain or dye. And they are scrapbook safe, in case you were wondering.) For an additional fee they may also be engraved with initials/names and/or a date, so customisation is also an option!

To find out more, please contact me via e-mail on almostamsterdam{at}gmail.com. If you've joined Etsy you can also contact me via Etsy. The planes on Etsy can be found here.


Wednesday, 24 August 2011

Pucker Up!


So things have been a little crazy lately and this post should have been up much, much earlier. Please accept my apology! For those who are interested, straws with lip decorations are now available in my Etsy shop.

Initially I've listed DIY straw decorations to allow those of you living in the Netherlands to buy your own straws and just order the decorations. Unfortunately this has become a bit of an admin nightmare for me with people from abroad ordering the DIY option without realising that it might be quite painful to find the right straws to fit through the holes in my straw decorations. (As it turns out a 5 mm straw is not necessarily a 5mm straw!) To make things easier for Etsy shoppers who come from all over the world I am now including straws in all my standard listings for straw decorations.

But please note: if you have your heart set on using your own designer straws with my decorations I can still customise them for you, or do listings without straws included.

How will it work? There are two options:

You can physically mail one of the straws that you would like to use to me. I can then size it and adapt the straw decorations accordingly. Alternatively you can order a straw sizing chart from me. This  is a simple sheet of cardstock with holes in various sizes cut into it. You can then physically push your straw through the different holes to determine the right size. Once you know the right size you can let me know what it is and I can customise your straw decorations so they will fit your straws. This might sound silly, but unfortunately a hole that is too big by even a tenth of a millimetre can cause your decorations to slide to far down, while a hole that is just a fraction too small will mean that your straws won't fit!)

You can find my straw decorations in my Etsy shop: http://www.etsy.com/shop/AlmostAmsterdam

The straw decorations are a lot of fun. They are wonderful ice breakers at parties and they make for great photos, so go and check them out! And remember: if you're looking for something specific, please feel free to contact me and ask. Since I lasercut many of the items in my shop I offer a lot of flexibility with regard to customisation! Just e-mail me or contact me via my Etsy shop!

Friday, 29 July 2011

Mustaches

Hi Everyone!
It's been a few days, but here I am: very excited to tell you about the mustaches I've been making, right here in my little studio!

I've recently done listings for mustaches in my Etsy shop. There are mustache straw decorations as well as DIY mustache packs. The latter are ideal for decorating straight straws, cards, tags, and so forth, or you can simply add a stick and some adhesive and you have some fun photo props.  Mustaches are cut from sturdy double-sided cardstock and they come in black, dark brown or dark grey. The straws come in pink, red, green or blue. 

Lips and a few other fun items will also be available soon, as well as ready-made photo props. I will do another post once those listings are up.

You can purchase the mustaches via my Etsy shop, or you can e-mail me at almostamsterdam(at)gmail.com.

Monday, 18 July 2011

Traditional Bunting


I can't do a series of posts about garlands and bunting without including some traditional bunting! I saw these stunning photographs of tradional bunting (apparently made by the bride herself) on the website of one of my favourite photographers and I fell head over heels in love with the fresh, but romantic look created with the bunting made from fabric in shades of mainly pink and blue.


Tuesday, 12 July 2011

Ribbon chandelier

I know I'm supposed to be on a bunting and garland spree and technically speaking a ribbon chandelier does not qualify as one of the two, but I wanted to do a post on it, as it is also something that you can hang up and use to decorate space above a table, under a tree, or wherever you want to! (And because I love ribbon and lace and am totally in love with any idea that promotes the use of these materials for projects that aren't too feminine and girly! I am married to a man who will probably move to the garden shed if I decided to decorate our home with ribbons tied in bows, but I'm sure even he can live with something this pretty!) The image below comes from 100 layer cake and there are general tips on how to make your own ribbon chandelier here, but the idea can easily be adapted, if you would prefer a ribbon garland.


The image below is from a wedding in Franschoek, South Africa, and I think this combination of ribbon, crystals and paper butterflies is absolutely stunning!


Here you can see a close-up:


Monday, 11 July 2011

Pompom Garland

I've seen this Pompom Garland on Etsy. Millalove describes the garland as "possibly the happiest thing I've created"! I must agree: this garland will bring happiness to any setting. Millalove is based in the UK, which means you won't have to wait too long for shipping if you want to order one!


Source: http://www.etsy.com/listing/41969765/pom-pom-garland

Pompoms are easy to make (many of us have made them as children) so you can also make your own pompom garland if you have some time on your hands. You can find instructions for making pompoms all over the web, for example here  (movie) and here (written instructions)!

Sunday, 10 July 2011

Fabric Scrap Garland 2

I came across this beautiful garland that's in the same style as those in the previous post, so I thought I'll add this picture before moving on to different styles of bunting. This time the fabric strips are longer and closer together - almost ribbon-like. If you're lazy or pressed for time you can simply rip your fabric into strips to form ribbons and then cut them to the desired length afterwards!

Fabric Scrap Garland 1

Bunting and garlands are such a fun way to add festivity to a special celebration or to just add a bit of fun to a room in your home. There are just so many lovely ideas out there that I've decided to do a few different posts. Thought I'll start off with this one, which is so easy to do yourself, even if you're not good at sewing!


You can simply use a sewing machine to stitch random scraps of fabric (more or less rectangular) into a garland by stitching through the scraps and leaving some open spaces in between. What's great about this is that you can use fabric scraps and offcuts or go green and recycle some old clothes that you won't wear again, or other textiles from around the house. Or you may use fabric that holds some special memories for you ...

Don't own a sewing machine or intimidated by yours? Then you can create something similar by hand! Simply thread your fabric scraps onto embroidery thread with a needle. This will take a little longer, but it's an easy project to finish while watching your favourite tv programme!

Source: I don't know! If this photo belongs to you, please let me know the details. I would love to give you credit, but I can't remember where I found it!

Monday, 27 June 2011

Lasercut birdcages

Hello Everyone!

It is incredible hot here in the Netherlands and I'm sitting in my studio with a fan blowing directly on me! Those of you who know me personally will know that I don't really like the heat so much, but I'll try not to complain, because I know a lot of people who are very glad for some sunshine after the mostly miserable weather that we've been having lately. But enough about the weather:

Today a bit of news from my Etsy shop. I'm in the process of revamping my Etsy shop to give it a bit of a new look and I am also making some changes as far as products and pricing are concerned. So please pop in to see what I am up to. You can expect some more new products in the next week or so, but today I've added some pretty lasercut birdcages - ideal as wedding decor and to take home afterwards to feather your new nest. 


These birdcages were lasercut from 285gsm  shimmer cardstock. I sell them without ribbon so they can be colour coordinated with whatever you plan to do with them. For this photo I've added some French satin ribbon in shades and combinations of pink because I like a bit of a more playful, slightly mismatched or eclectic look. I think this particular design is especially suitable for weddings or a romantic bedroom. (Guess who's on the lookout for a nice vintage frame ... so that I can frame one to hang above our bed!)

You can find more details about these whimsical paper cages here and here or you can write to me directly at almostamsterdam(at)gmail(dot)com if you have any questions.

Sunday, 19 June 2011

Change

Hello, Everyone! You should prepare yourselves to see some changes to my blog. The biggest change will be that I will in future publish in English. There are two reasons for this change: The first reason is that I receive more international queries than local ones! To make my blog more accessible to everyone and to try and standardise things a little I will in future blog in English. I  will bring you more information from all over the world, but with suggestions for vendors in Europe.

The second reason is more personal: I love blogging and talking to you all, but it still takes me very long to try and formulate perfect Dutch sentences when writing, as Dutch is not my mother tongue! By the time that I am more or less satisfied (take note: not convinced that there are no errors!) with a post it has become old news to me, which takes the fun out of publishing it. It will therefore be more practical for me to rather write in English. Since it will be much quicker to do, I will be able to also blog more often! This does not mean that I don't value my Dutch followers. You will still be welcome to leave your comments in Dutch or to write to me in Dutch!

I've decided to revamp my blog in more than one way, so you can expect to see a new logo up in the next few days, as well as some new categories for posts. I will talk to you again soon!

Monday, 14 March 2011

Doe-het-zelf: Laser gesneden trouwkaart (Etsy) - DIY laser cut invitation (Etsy)

Thought I'll give you a sneak preview of the lasercut wedding invitation that will be available from my Etsy shop from tomorrow (15 March 2011)!

You can order the lasercut invitation, which comes with a loose insert or A4 sheet (let me know what you prefer) and a matching envelope of your choice. I've used some striped ribbon and a faux pearl to dress up the card. The favour box (also available at http://www.etsy.com/shop/AlmostAmsterdam from tomorrow) was decorated with some striped ribbon and an acrylic disc. The ribbon was some leftovers from my own stash. The thank you discs will also be available from my Etsy shop very soon, but if you need them immediately, you are welcome to e-mail me. (Minimum quantity: 25. Available in English, Dutch, German & French).

This was such an easy project, that, once you have the supplies, you'll be able to personalise your invitations in no time!

Wednesday, 2 March 2011

Doe Het Zelf Uitnodiging - Almost Amsterdam (Etsy)

Deze uitnodiging kan je tuis maken.:
  • Computer en printer
  • Vierkantige mapje en A4 karton ("square paper pocket" en "A4 cardstock" online te bestellen by http://www.etsy.com/shop/AlmostAmsterdam)
  • Lint naar keuze (Jan De Grote Kleinvakman in Amsterdam)
  • Bloemen van tulle (Ik kan deze snijden op bestelling)
  • Gehaakt bloem (Jan De Grote Kleinvakman of mischien kan Oma helpen!)
  • Silver "brad"
  • Pons (Ik gebruik een pons van Making Memories)
  • Stanley mes en liniaal of "paper trimmer"
  • Snijmat
  • Dubbelzijdige plakband

Tuesday, 1 March 2011

Life is what happens when we make other plans ...

I was hoping to launch my Etsy shop at the end of November 2010, but due to delays and public holidays I’ve received the paper and cardstock a few weeks late. Since I could not do much about Etsy without paper in stock I’ve decided to accept a major editing project to fill the time that I would have devoted to Etsy. (Yes, I also do translation and editing work when I'm not designing or "playing" with paper!)

By the time that my paper arrived I barely had the time to check the delivery, let alone time to make samples to photograph for Etsy! So Etsy had to be put on hold a little longer. Fortunately I have finally finished the project (and started catching up with everything else that had to wait!) and there is finally time to focus on Etsy and an impressive stash of paper that won't run out too soon!

Getting an Etsy shop up and running is still a bit of a learning curve for me, but I am slowly getting the hang of it! In the next couple of weeks I plan on listing a few basic, but really pretty stationery items in my Etsy shop that will make it possible for all you creative people out there to make your own invitations, wedding stationery, birth announcements and other special event paper goods.


The Almost Amsterdam shop on Etsy is specifically aimed at DIY. With the exception of a few supplies that I will stock in future because they match my products, all products will be handmade in my little home studio – a converted spare bedroom in our house! I have a few pieces of really cool equipment, so you don’t have to be worried about crooked lines and poor quality. I guess what I am trying to say is that you can expect high quality, but exclusive products, not readily available in shops.


The idea is to help you create really pretty, really professional looking stationery by combining my creative efforts with yours! I’ve chosen some beautiful Italian paper that isn’t readily available in shops here in the Netherlands, but that is fairly easy to work with and that is approved for use in both inkjet and laser printers.

I want to offer an alternative to those of you who aren’t that fond of ordering a mass produced card from a catalogue at a printer. You’ll be able to purchase the pre-cut cards and some paper or cardstock that you can use to design and print your own invitations and stationery on your home computer and printer. Personalisation of many products will also be possible.

In the next couple of weeks I will list products on Etsy, but in the mean time, please feel free to convo me via Etsy, or to e-mail me, should you want to know about specific possibilities.

You can find my Etsy shop here: http://www.etsy.com/shop/AlmostAmsterdam

Oh, and please check back tomorrow! I will do a post on a wedding invitation made from this pink pocket, some cardstock and a few tidbits all available right here in The Netherlands!


Wednesday, 19 January 2011

Die-cutting/"Stansen"

Last week I was trying to explain to someone what I do. I mentioned the word “die-cutting” and she got this blank expression on her face, so I had to explain. (I still do lots of explaining, because my Dutch is still FAR from perfect!) I was proud of myself, because I knew the Dutch word (“stansen”) too, but this was not enough. It made me realise that many Dutch brides and grooms might not be familiar with especially the English term, so I thought it might be useful to post a short explanation here on my blog, especially because I’ll soon be selling die-cuts (“stansvormen”) in my Etsy shop.

 
Die-cutting is a method by which a specific shape (for example that of an envelope, box or flower) is cut from or punched out of paper or fabric by using a metal form that is called a die. The noun “die-cut” is used to refer to the cut out shape.

Below is a picture of a die:

 
This die was used to make this box:


I will soon be offering die-cuts cut from my collection in my Etsy shop. As soon as they become available I will do a post on my blog. If you need die-cuts before then, please contact me via e-mail.